The website is running on your computer. Someone else needs to see it. You should not have to set up an entire deployment just to get feedback.
That is what I like about Cloudflare Quick Tunnels. Once cloudflared is installed and your app is running on port 3000, this is the command that makes it reachable from the Internet:
cloudflared tunnel --url http://localhost:3000
You get a public HTTPS link for free. No Cloudflare account, no domain purchase and no DNS setup are required for this temporary preview. That is the appeal of Cloudflare's Quick Tunnels offering: sharing the app without setting up a hosting account first.
The important distinction: your app becomes publicly reachable, but it still runs on your computer. This is a tunnel, not an upload to permanent hosting.
From a local website to a WhatsApp link
The example that prompted this article is a website preview for Eichhörnchen Auffangstation Berger, shared in WhatsApp. The link showed up with the website's title and description. My reaction in the chat was simply: “1 command”.
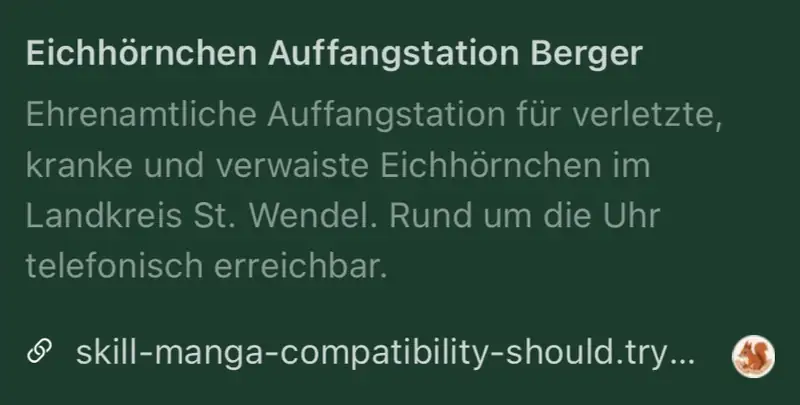
That small moment explains the appeal better than a feature list. A local project becomes something you can send to another person. They can open the page themselves instead of trying to evaluate it through a screenshot or a screen-sharing session.
For a website like this, the useful questions are practical. Is the purpose clear? Is the text readable on a phone? Can someone find the contact information without searching? I want those conversations to happen while changes are still easy to make.
This is also why I care about technology that makes animal-welfare work easier. The value is not another complicated system. It is removing a small obstacle between useful work and the people reviewing it.
What happens behind the command?
Cloudflare's Tunnel architecture uses a small connector called cloudflared. It establishes an outbound connection from your machine to Cloudflare. Visitors reach Cloudflare, and their requests travel through that connection to your local web server.
The request path is:
Visitor's browser → Cloudflare → cloudflared → localhost:3000
You do not need to forward an incoming port on your router or give visitors your home IP address. Your network must still permit the connector's outbound traffic; “no port forwarding” does not mean a tunnel can ignore network restrictions.
The browser-facing address uses HTTPS. In this example, the last hop from the connector to the app is local HTTP. Cloudflare is part of the traffic path, not a hosting destination that continues running your app after your computer stops. That follows directly from the connector model.
Getting started without hiding the prerequisites
“One command” describes starting the tunnel. There are two things to have ready first: the connector and a running web app.
Install cloudflared once
On macOS with Homebrew installed:
brew install cloudflared
Cloudflare's official downloads page also provides Windows installers, Linux packages and standalone binaries. Use the option for your operating system and keep the connector updated.
Start your existing app
For a project that defines a dev script and uses pnpm:
pnpm dev
Open the local address printed by your development server. Check that the page works before adding a tunnel. This article uses port 3000; use your app's actual port instead.
Only expose a service you are comfortable making public. Do not point a file server at your home directory, or use a database admin interface as a convenient test page.
Open a second terminal and create the preview
Keep the app running in the first terminal. In the second:
cloudflared tunnel --url http://localhost:3000
The connector prints a randomly assigned *.trycloudflare.com address. Copy that exact HTTPS URL and open it on your phone, ideally over mobile data, before sharing it. Cloudflare documents this localhost-to-public-URL workflow.
Leave both processes running and keep your computer awake and connected during the review. When you are done, press Ctrl+C in the tunnel terminal. Cloudflare's original Quick Tunnels explanation describes how disconnected tunnels are cleaned up. Starting a new Quick Tunnel gives you a new random address, not a permanent bookmark. Stopping the tunnel does not retract content someone already received, such as a chat's link preview.
The real benefit is a shorter feedback loop
A client does not need to understand your repository, terminal or deployment platform to review a page. “Open this link and try the navigation” is a much more useful request than “imagine how this screenshot behaves”.
The same applies to a teammate checking a form or someone testing the page on a different phone. Cloudflare explicitly includes sharing across networks and browser testing among the intended uses.
For me, the best review is specific: open the page, complete one action, and describe where it became confusing. A working preview lets that happen early. It does not make the feedback automatically good; it gives people something concrete to respond to.
This is useful alongside AI-assisted development too. An agent can help build a screen, but a person still needs to use it. My preferred workflow is to review the local app, explicitly approve temporary public access, share the preview, make the changes and stop the tunnel.
Public HTTPS is not private access
A random URL is not a password. The basic command does not create a login screen or restrict the audience to the people you send the link to.
For a public-facing mockup with demonstration data, that can be exactly what you need. For an internal dashboard or anything containing customer information, it is not enough. Keep authentication in the application, or use a managed tunnel with a properly configured Cloudflare Access policy. Access is a separate authentication layer; it is not silently added by the one-line command.
I would also avoid giving an agent blanket permission to expose arbitrary local ports. Check which service is being shared and what its routes reveal. A preview should contain the work you intend to show, not the rest of your development environment.
The limits are clear—and worth knowing
Cloudflare's Quick Tunnels documentation states three important constraints:
| Constraint | What it means |
|---|---|
| 200 concurrent in-flight requests | A limit on requests being handled at once, not 200 visitors or requests per day. Excess requests receive HTTP 429. |
| No Server-Sent Events (SSE) | Do not assume an SSE-based streaming interface will work through a Quick Tunnel. |
| No uptime guarantee or SLA | This is for testing and development, not a production availability promise. |
The SSE restriction matters when the thing you want to demonstrate is a streaming chat interface. A normal page loading successfully does not prove that every streaming feature works. Test the actual interaction, or choose a suitable managed setup.
These limits do not make the tool less useful for its purpose. They make the boundary easier to understand: share a temporary preview, not a production dependency.
When the first attempt does not work
A 502 error: Check whether the app is still running and whether the URL, port and protocol match. Cloudflare's origin troubleshooting guide explains that a connected tunnel does not prove the connector can reach the app. Test the local address first.
The framework rejects the hostname or origin: Read its development-server configuration. Vite has server.allowedHosts; Next.js has allowedDevOrigins. Add only the exact hostname assigned to your preview where required. Do not disable the protections globally or allow every *.trycloudflare.com host.
An existing cloudflared setup interferes: Cloudflare documents a Quick Tunnel conflict with .cloudflared/config.yaml. Check for that file. Do not delete a working configuration; preserve it and avoid disrupting another tunnel.
The connector cannot connect: In a restricted network, consult Cloudflare's outbound firewall requirements. Tunnel traffic uses port 7844: UDP for QUIC or TCP for HTTP/2. Ask the network administrator rather than disabling the firewall.
Also check the app itself: a frontend that tells a visitor's browser to call localhost is telling it to call that visitor's device. The tunnel does not automatically rewrite hard-coded API addresses or authentication callback URLs.
When the preview becomes a real service
When other people need a stable address, move to a deliberate deployment. Cloudflare's managed Tunnel setup supports an account-owned tunnel and a hostname on your domain. Configure Access separately when the service should be private.
A managed tunnel still needs an origin that stays online. It does not remove the need for application security, backups or reliable hosting. The change is from a disposable review link to infrastructure you intentionally operate.
For the earlier stage, though, I do not want to turn “can you look at this?” into an infrastructure project.
Build locally. Run one command. Send a real preview. Get useful feedback.
That is the reason Quick Tunnels belongs in my development toolkit.
Technical details checked against the linked official documentation on September 23, 2026. The image is a cropped real screenshot; the commands are documented examples, not a timed deployment benchmark.